4 Ways You Can Make Your Reps More Productive Today – Download Now

Building a calculator with WP Forms plugin

Building a calculator with WP Forms plugin

One of the great things about WordPress is the great number of amazing plugins that are available to extend/build functionality in any type of website. One such amazing plugin is the WP Forms plugin which is a great plugin to create amazing forms quickly. However, what I really like about this particular plugin is how it provides amazing options to extend its features with the right use of actions and filters.

So when needing to build a customized calculator WP Forms seemed like a great choice. So here is how we built a custom calculator for a client using WP Forms.

Step 1:
Create your form

This is a no-brainer considering how easy it is to create a form using WP Forms. Make sure that whatever fields you want to use for calculation are numbers – this way the validation check are done for you already.

Step 2:
Note the numbers for the fields on which you want to perform calculation.
WPForms Builder - Field Numbers

Step 3:
Find out the id for the form.
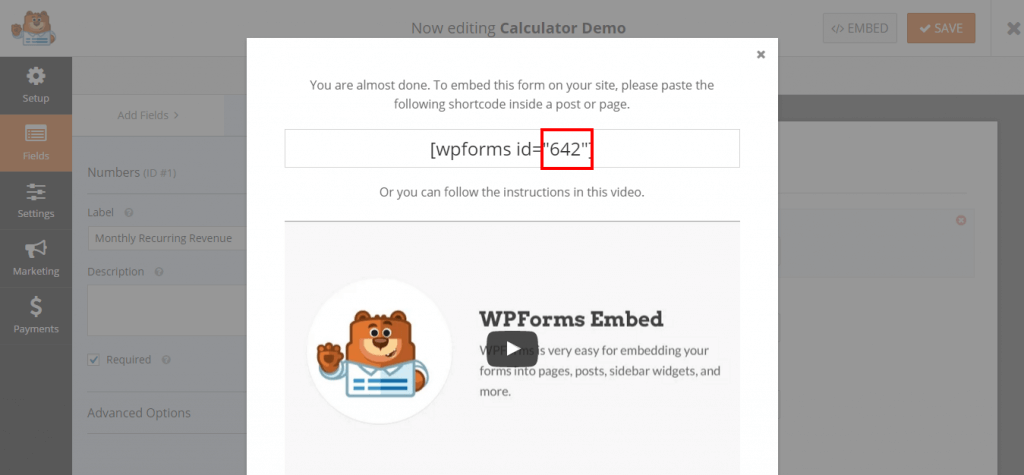
WPForms Builder - Form ID

Step 4:
Add this bit of code in your site (usually the functions.php file)
https://gist.github.com/speedguy/672dc22f2e30c2b21ced97a4dcc1e338

Advantages of this approach

  • You can use the validation methods that already come built inside WP Forms
  • Entries are stored at the backend for later reference (you can even export these as a csv)
  • Email is sent with the form data – it can be customized to show the form calculation result as well (not covered in this example)
  • Using the Pro version of the plugin you can actually build a multi page/part calculator where data is gathered over multiple steps and then processed at the end

Click Here For Demo

* Note that the version we used is the pro version which has some features available that are unavailable in the free version (such as multi-page conditional forms) – but effectively the idea is the same. You can build multi-step conditional forms that perform complex calculations using this method.

Adding styles/scripts only when a shortcode is present in content

Shortcodes are one of the wonders of WordPress and allows the developer an easy way to provide a functionality to the end user. However, it can be slightly tricky to add a script or a stylesheet to a shortcode which only loads when the shortcode is there (so basically instead of loading the script/stylesheet sitewide WordPress only loads it when the content contains the shortcode).

Basically the trick is to register the style/script and then enqueue it only when you need it.

So in your functions.php (or main plugin file) do something like this:

[php] add_action( ‘init’, ‘my_shortcode_scripts_styles’ );   //Hook your function to when WP initializes
function my_shortcode_scripts_styles() {
wp_register_style( ‘my-shortcode-style’, ‘url-to-the-stylesheet’);
}
//The function above registers the style (or scripts if you need those too) [/php]

Remember to change the parameters to suit your needs. Then in your function that renders the shortcode do this:

[php] wp_enqueue_style( ‘my-shortcode-style’ ); [/php]


Getting WooCommerce product detail in a page template

We recently had a project where there was a need to get the product description on a page. The page basically needed to show the product description and some other details only (not the full product) on a page. Here is how we handled it – any suggestions or comments on improving this would be welcome:

Show different excerpt length for different post types

If you have custom post types then there is a likelihood that you may want to show them on the same page but have different excerpt length for each of theme. Here is a simple snippet to help do this:

Replace “my-custompost-type1” with the slug of your custom post type. Obviously you can also add another if statement and adjust for other custom post types that you may have.